Wednesday, July 22, 2020

remote desktop error 「CredSSP 加密預示修復」錯誤

「CredSSP 加密預示修復」錯誤

最常見的案例是,用戶端已安裝 CredSSP 更新,而 加密預示修復 措施設定會不允許使用遠端桌面協定連線至未安裝 CredSSP 更新的伺服器。
如果需要替代的解決方案,請依照下列步驟執行:
  1. 在用戶端上安裝 CredSSP 更新,執行 gpedit.msc,然後在導航窗格中瀏覽至 電腦設定 > 系統管理範本系統>認證委派  
  2. 加密預示修復 變更為啟用,然後將保護層級變更為 易受攻擊

Monday, March 19, 2018

Redhat Logs Rotation

/etc/logrotate.conf

$ ls -l /etc/logrotate.d
total 64
-rw-r--r--. 1 root root 155 Aug 20  2014 aide
-rw-r--r--. 1 root root 178 Jun 23  2015 chrony
-rw-r--r--  1 root root 292 Mar 19 09:50 content_gateway_rotate
-rw-r--r--. 1 root root  71 Jul 21  2015 cups
-rw-r--r--  1 root root 172 Jun 29  2016 iscsiuiolog
-rw-r--r--  1 root root 165 May 26  2016 libvirtd
-rw-r--r--  1 root root 163 May 26  2016 libvirtd.qemu
-rw-r--r--. 1 root root 106 Sep  5  2014 numad
-rw-r--r--. 1 root root 136 Jan 27  2014 ppp
-rw-r--r--. 1 root root 408 Oct  1  2014 psacct
-rw-r--r--  1 root root 115 Jul  4  2016 samba
-rw-r--r--. 1 root root  71 Oct 13  2015 subscription-manager
-rw-r--r--. 1 root root 224 Sep  8  2015 syslog
-rw-r--r--. 1 root root  32 Dec  9  2013 up2date
-rw-r--r--. 1 root root 100 May 20  2015 wpa_supplicant
-rw-r--r--. 1 root root 100 Sep 11  2015 yum


$cat /etc/cron.daily/logrotate
#!/bin/sh

/usr/sbin/logrotate /etc/logrotate.conf
EXITVALUE=$?
if [ $EXITVALUE != 0 ]; then
    /usr/bin/logger -t logrotate "ALERT exited abnormally with [$EXITVALUE]"
fi
exit 0


UNIX performance tuning commands

Linux
nproc
lscpu
top
sar
iostat
vmstat

Solaris
prstat -a

Thursday, February 15, 2018

redhat su: Permission denied

edit
 /etc/pam.d/su
remark the following line
auth       required     pam_wheel.so use_uid
It requires users to be in the wheel group to be able to switch user. 
User switching as non-root works again when this pam module is disabled for su.

Sunday, March 19, 2017

kmplayer lag

過濾器控制>來源撥放器>其他>matroska 打勾 過濾控制器>解碼器使用>內部視訊解碼器>通用>H.264 設為

Thursday, September 01, 2016

ksh rename file

rename all *.p.enc file to *.enc


for f in $(ls *.p.enc)
do

mv ${f} ${f%p}enc

done

Thursday, March 12, 2015

HMC web console V7R7.3 pending issue

For Firefox
1) Start up Firefox 
2) In the URL area, type about:config 
3) In the search area type tls 
4) Change security.tls.version.min from "1" (default) to "0." 
5) Change security.tls.version.fallback-limit from "1" to "0"

For Chrome
1) Start Chrome 
2) In the URL area type: chrome://flags 
3) Find the "Minimum SSL/TLS version supported" flag and change the value to SSLv3. 

Monday, May 26, 2014

Edit the "last" output in AIX

/usr/sbin/acct/fwtmp <./wtmp > ./dummy.file

/usr/sbin/acct/fwtmp -ic <./dummy.file > ./wtmp

Friday, May 09, 2014

Export Windows Update History

Windows 2008

wmic qfe get /format:csv > updates.csv

Friday, October 25, 2013

Windows 2008 Time sync. configuration

1. check the time server with "w32tm /stripchart /computer:[Time_Server_IP] /dataonly /samples:5"

2. sync by setting "w32tm /config /manualpeerlist:[Time_Server_IP],0x8, /syncfromflags:manual /update"

  • 0x8 -- set Windows time to use client mode

3. Or if it has joined the domain, default it should be syncing with one of the Domain controllers

4. you can manually configure that by typing: "w32tm /config /syncfromflags:domhier /update"

5. restart the time service
  • net stop w32time
  • net start w32time

6. "w32tm /resync" to sync immediately ( it may failed, re-run step1 to verify the status)

Monday, September 16, 2013

Export and Import DHCP Reservations for Windows Server

Export the DHCP reservation list on A server,

netsh dhcp server [ip address] scope [scope address] dump > reservation_list.txt
e.g. netsh dhcp server 172.17.32.131 scope 172.17.32.0 dump > reservation_list.txt

Edit the exported file in notepad 'reservation_list.txt' , Simply do a Find and Replace for the A server IP you ran the export on and change to the B server IP you are importing to and remove out everything else in the text file except for the reservations config section.

Import the DHCP reservation list:
netsh exec reservation_list.txt


Friday, April 05, 2013

AIX NFS sharing/mounting

NFS Sharing

start NFS service
-->smitty-->Communications Applications and Services-->NFS-->Network File System (NFS)-->Configure NFS on This System-->Start NFS
share a file system
-->smitty-->Communications Applications and Services-->NFS-->Network File System (NFS)-->Add a Directory to Exports List (or smitty mknfsexp)
list out all shared file system
#showmount -e localhost

NFS Mounting


mount a file system
-->smitty-->Communications Applications and Services-->NFS-->Network File System (NFS)-->Add a File System for Mounting (or smitty mknfsmnt)

Thursday, December 06, 2012

Add static route in windows

Add static route in windows:

 1. shows routing table

 netstat -nr

 2. permanent add connecting to 172.17.0.0 through 172.17.32.1 gateway with the lower priority 2

 route -p add 172.17.0.0 mask 255.255.0.0 172.17.32.1 metric 2


Tuesday, April 12, 2011

blocking application in winXP

1. Start->Run->secpol.msc 

2. Expand software restriction policies
Right click Additional rules-> New Path Rule
Path: C:\Program Files\Outlook Express\msimn.exe
Security Level: Disallowed
Click OK

Monday, October 11, 2010

Manage Windows7 SEP client with SEP 11 SEM

1.) Clients don't appear in the SEM console
a. Delete %programfiles%\Common Files\Symantec Shared\HWID\sephwid.xml
b. Open the registry and navigate to HKLM\Software\Symantec\Symantec Endpoint Protection\SMC\Sylink\Sylnk
c. Edit the "HardwareID" value data to be blank
d. Restart the client workstation or Symantec Management Client (SMC) service in the services snap-in.

refer: http://www.symantec.com/business/support/index?page=content&id=TECH102815&locale=en_US

Wednesday, March 24, 2010

sed & awk

Split the line with field separator ".", and restructuring again
awk -F. '/stbdbp/{ print $2"."$3"."$4"."$5".Z"}' ./list.txt
 
Insert "go" to the next of every lines from test_new.log
sed '1,$ {
        a\
go
}' test_new.log
 
Remove the line which contains "#" from test_new.log
sed '/#/d' test_new.log
 
Remove blank line from test_new.log
sed '/^[ ]*$/d' test_new.log

Monday, June 08, 2009

solaris 10 with Storage 3320

#sccli
>show lun
>show channel
>show logical-drive
>show partition

Thursday, November 06, 2008

error log, enable tty console

errlogter (test the errpt)
/usr/lib/errdemon (errpt demon)
alog -o -t console (show console message)

smitty tty

Friday, October 24, 2008

check memory info. in AIX

# bootinfo -r

# svmon -G (use 4K block to count)
size inuse free pin virtual
memory 1048576 584861 463715 82089 532513
pg space 425984 409635

work pers clnt lpage
pin 82089 0 0 0
in use 289507 295354 0 0

Thursday, October 09, 2008

Unlock root account in HP-UX

From
How to unlock locked root account in HP-UX

By default HP-UX disables the root account if there is repeated number of failed (bad password) attempts. If you root account has been disabled because of bad password there are two options you two ways you can unlock the account without rebooting the server.

1.If you have sudo installed and your account is setup with root privileges then you can login as sudo su and then you can unlock the account using modprpw

$/usr/local/bin/sudo su –

##/usr/lbin/modprpw –l –k root


2.If you don't have sudo setup then other way out is to check on GSP console if you already have root logged in then you can re-enable root account from GSP console

Thursday, August 21, 2008

About Tape Drive in Solaris

New install:
devfsadm

Already installed
modinfo //find the 'st' driver.
modunload -i //The driver should unload.
mt -f /dev/rmt/0cbn status //The driver should reload.

Tuesday, April 01, 2008

nice command

kill process from "ps -ef"
ps -ef grep -v grep grep [process_name] awk '{print $2}' xargs -t kill -9 >> $outfile 2>&1

Thursday, February 14, 2008

Sybase RPC between different servers

local server: A
remote server: B

1. login to A
2. add server B records at A's interfaces file
3. isql to A's Sybase
4. sp_addserver [server name],[remote server network name (e.g. same as interfaces file)]
  • sp_addserver B,B
  • go
5. create proxy table [table_name] at "[server.db.dbo.table]"
  • use master
  • go

  • create proxy_table proxy_tb_a at "B.db_a.dbo.tb_a"
  • go

  • insert into proxy_tb_a values(....)
  • go

Monday, February 04, 2008

solaris 5.8 notes 3

large file maintenance:
cp large.log large.log.20080204.bak
cat /dev/null > large.log

Monday, December 17, 2007

Solaris Explorer

當你Solaris OS發生問題要怎麼辦
首先,你必須將系統的狀況回報給維護廠商

1. 執行 Explorer 程式:
# cd /opt/SUNWexplo/bin
# ./explorer

如果要針對Storage問題,執行指令如下
# ./explorer -w default,storage,fru

當程式執行完畢你會看到
explorer: Explorer finished 的訊息

2. 當程式執行完後,
# cd /opt/SUNWexplo/output
# ls
explorer.XX-2007.12.16.07.43.XXXX
explorer.XXXXXXXXX-2007.12.16.07.43.tar.gz
把 explorer*.tar.gz 寄出給維護廠商

Wednesday, December 05, 2007

Sybase's Login

Sometimes, we would like to know where a sybase's user come from? (e.g. IP)
1.) Find out the login's suid by using sp_displaylogin
1> sp_displaylogin person1
2> go
Suid: 2608
Loginame: person1
Fullname:
Default Database: mydb
Default Language:
Auto Login Script:
Configured Authorization:
Locked: NO
Date of Last Password Change: Nov 27 2007 11:03AM
Password expiration interval: 0
Password expired: NO
Minimum password length: 6
Maximum failed logins: 0
Current failed login attempts:
(return status = 0)
2.)Then select from sysprocesses by using the "suid"
1> select * from sysprocesses where suid=2608
2> go
spid kpid enginenum status suid hostname
program_name hostprocess cmd cpu physical_io
memusage blocked dbid uid gid
tran_name
time_blocked network_pktsz fid execlass
priority affinity id stmtnum
linenum origsuid block_xloid clientname
clienthostname clientapplname sys_id
ses_id loggedindatetime ipaddr
------ ----------- ----------- ------------ ----------- ----------
---------------- ----------- ---------------- ----------- -----------
----------- ------- ------ ----------- -----------
----------------------------------------------------------------
------------ ------------- ------ ------------------------------
---------- ------------------------------ ----------- -----------
----------- ----------- ----------- ------------------------------
------------------------------ ------------------------------ ------
----------- -------------------------- ---------------
53 163185511 0 recv sleep 2608 ssksdev1
AWAITING COMMAND 0 0
2 0 4 2609 0
NULL
NULL 512 0 EC2
MEDIUM ANYENGINE 0 1
1 NULL 0
0
0 Dec 5 2007 3:56PM 10.47.1.215

(1 rows affected)

3.) Now we know person1 is connected by using 10.47.1.215 machine =)

Friday, November 30, 2007

Thursday, November 08, 2007

Sybase Tuning

Engine
- no. of Engine
Cache
- create temp_cache, hot_cache, etc.
- cache size
- no. of cache partition (e.g. 2,4,8 but no bigger than no. of Engine)
- Large I/O pool (e.g. 2k,16K base on how many cache size?)
DB
- create tempdb, tempdb2, tempdb3, etc.
- sp_bindcache cache_name, dbname
Table / Object
- create index for table
- sp_bindcache cache_name, [,[owner.]tablename [, indexname | "text only" ] ]
Number of User connection
Number of open object

Friday, March 23, 2007

Sybase add user error

Error Message
Server Message: Number 17331, Severity 16
Server 'SYBASE', Procedure 'sp_adduser', Line 253:
User already has a login under a different name.

use the following sp

CREATE PROCEDURE drop_user_null_userdb
AS
DECLARE @username VARCHAR(25)
DECLARE GetOrphanUsers CURSOR
FOR
select Username = name
from userdb..sysusers
where suid not in(select suid from master..syslogins) and gid = 16390 and suid != -2

OPEN GetOrphanUsers
FETCH GetOrphanUsers
INTO @username

WHILE @@sqlstatus = 0
BEGIN

exec sp_dropuser @username


FETCH GetOrphanUsers
INTO @username
END

gid and suid need to change before exec

Thursday, March 22, 2007

solaris 5.8 / 10 notes 2

Remove Interface

1. Remove or rename the /etc/hostname.hme0 file
2. ifconfig hme0 down
3. ifconfig hme0 unplumb
4. Edit /etc/hosts and /etc/netmasks
5. boot

Configure Interface
1. Create the /etc/hostname.hme0 file
2. ifconfig hme0 plumb
3. Edit your /etc/hosts and /etc/netmasks
4. boot

DHCP server:
# dhcpconfig (command prompt)
or
# dhcpmgr (GUI)

Disk Management

fdisk /dev/rdsk/c4t4d5s0 [rdsk/c4t4d6s0]

format>partition

newfs /dev/rdsk/c4t4d5s0 [rdsk/c4t4d6s0]

RAID 0 (concatenation)

metainit d4 3 1 c1t5d0s0 1 c4t4d5s0 1 c4t4d6s0

metainit d4 2 1 c4t4d5s0 1 c4t4d6s0

mount /dev/md/dsk/d4 /sportix4
growfs -M /sportix4 /dev/md/rdsk/d4

/dev/md/dsk/d4 /dev/md/rdsk/d4 /devdb ufs 2 yes -

RAID 1 (umountable file system)

metainit -f d18 1 1 c2t8d0s0

metainit d28 1 1 c2t13d0s0

metainit d8 -m d18

umount /sportix4

vi /etc/vfstab
/dev/md/dsk/d8 /dev/md/rdsk/d8 /sportix4 ufs 2 yes -

mount /sportix4

metattach d0 d2


Add a user with rights as root
change the UID to "0" as same as root from /etc/passwd

Logging for executed commands

Solaris作業系統可以通過設置日 誌檔可以對每個用戶的每一條命令進行紀錄,這一功能默認是不開放的,為了打開它,需要執行/usr/lib/acct目錄下的accton檔,格式如下 /usr/lib/acct/accton /var/adm/pacct,在sun的手冊上,只有這一種用法,但這樣做的缺點是明顯的,大多數有經驗的入侵者一定不會放過/var/adm和 /var/log這兩個目錄的,如果它們看到有pacct這個東西,不刪才怪。針對這種情況其實有個很好的解決辦法,執行 /usr/lib/acct/accton 後面跟一個別的目錄和檔即可,如/usr/lib/acct/accton /yiming/log/commandlog,這樣入侵者不會在/var/adm/下看到pacct,入侵者也許會刪掉message,syslog等 日誌,但他並不知道實際上他所有的操作都被記錄在案,管理員事後只要把commandlog這個檔拷貝到/var/adm下,改為pacct ,同時執行讀取命令lastcomm,就一切盡在掌握啦。如lastcomm hack,可得到下面的輸出結果:

sh S hack pts/7 0.05 secs Mon Jun 12 14:28
sh F hack pts/7 0.00 secs Mon Jun 12 14:39
ls hack pts/7 0.01 secs Mon Jun 12 14:39
ls hack pts/7 0.02 secs Mon Jun 12 14:39
ls hack pts/7 0.01 secs Mon Jun 12 14:38
df hack pts/7 0.03 secs Mon Jun 12 14:38
ftp hack pts/7 0.02 secs Mon Jun 12 14:37
ls hack pts/7 0.01 secs Mon Jun 12 14:37
vi hack pts/7 0.02 secs Mon Jun 12 14:37
who hack pts/7 0.02 secs Mon Jun 12 14:36


Monday, March 19, 2007

Sybase "sa" Passwords Recovery

1. kill the sybase server

2. edit $SYBASE/ASE-12_5/install/RUN_ file

3. add "-psa" :
#!/bin/sh
#

# ASE page size (KB): 2k # Master device path: /home/sybase/data/master.dat
# Error log path: /home/sybase/ASE-12_5/install/SUN1.log
# Configuration file path: /home/sybase/ASE-12_5/SUN1.cfg

# Directory for shared memory files: /home/sybase/ASE-12_5
# Adaptive Server name: SUN1

# /home/sybase/ASE-12_5/bin/dataserver \
-d/home/sybase/data/master.dat \

-e/home/sybase/ASE-12_5/install/SUN1.log \
-c/home/sybase/ASE-12_5/spxh2_train.cfg \
-M/home/sybase/ASE-12_5 -psa \
-sSUN1 \


4. start the sybase server
./startserver -f RUN_

for example:
.....
00:00000:00001:2001/05/26 18:29:21.39 server 'bin_iso_1' (ID = 50)
00:00000:00001:2001/05/26 18:29:21.39 server on top of default character set:
00:00000:00001:2001/05/26 18:29:21.39 server 'iso_1' (ID = 1).
00:00000:00001:2001/05/26 18:29:21.39 server Loaded default Unilib conversion handle.

New SSO password for sa:tmfyrkdwpibung <-- find this line
.....

5. login sybase: isql -S -Usa -Ptmfyrkdwpibung

6. change sa password: sp_password tmfyrkdwpibung,newpasswd

7. shutdown sybase

8. fallback RUN_ file

9. start sybase again

OK now! =)

Thursday, February 22, 2007

MySQL 中文亂碼

先在 my.ini 中

[mysqld]
default-character-set=latin1

[client]
default-character-set=utf8
init_connect='SET NAMES utf8'

and
建立一個 mysql connection 檔案
這裏是 for PHP only:
<?
//database connection details.
$host = "localhost";
$link = mysql_connect($host, "login_name", "login_pw");
mysql_query("SET NAMES 'utf8'");
mysql_select_db("table_name", $link);
?>

ref: d.Cat blog

Tuesday, January 23, 2007

solaris 5.8 notes 1

Stop Power Management for Server (if turn it on before)
vi /etc/power.conf
autoshutdown 30 9:00 9:00 shutdown -- change to --> noshutdown

Network Configuration
use DHCP
1. touch /etc/hostname.<> (e.g. hostname.hme0)
2. touch /etc/dhcp.<> (e.g. dhcp.hme0)

use Fixed IP
1. touch /etc/hostname.<>(e.g. hostname.hme0)
2. echo "<> (e.g. sun1)" >> /etc/hostname.
3. vi /etc/hosts
127.0.0.1 localhost
# add a new line
loghost
e.g. 192.168.0.1 sun1 loghost
4. touch /etc/defaultrouter
5. echo "<>" >> /etc/defaultrouter
6. echo "<> (e.g. 192.168.0.0 255.255.255.0) " >> /etc/inet/netmasks
7. init 6
8. use ifconfig -a to check status
9. use ifconfig up/down to start/stop interface ( e.g ifconfig hme0 up )

Simple NFS Server Configuration
for example: wanna to share /testing with read & write permission
1. chmod 766 /testing
2. /usr/lib/nfs/nfsd -a (start nfsd service)
3. /usr/lib/nfs/mountd (start mountd service)
4. /etc/init.d/nfs.server start
5. share -F nfs -o rw /testing
6. showmount -a (check who are mounting from you)
NFS Client
for example: wanna to mount 192.168.0.1's /testing folder
1. mount 192.168.0.1:/testing /mnt
2. cd /mnt

Friday, January 05, 2007

Windows 2003 NTP Client/Server Installation & Configuration

NTP Server:

1. Configure the following registry entries:
HKEY_LOCAL_MACHINE\SYSTEM\CurrentControlSet\Services\W32Time
Parameters\Type: NTP
Config\AnnounceFlags: 5
TimeProviders\NtpServer\Enabled: 1
Parameters\NtpServer: NoSync

2. Restart the service after changing these parameters from command prompt:
net stop w32time && net start w32time

NTP Client:
1. 3 utilities required:
instrsrv.exe
srvany.exe
Automachron (achron.exe)

2. Install achron.exe, start it from command prompt:
c:\program files\one guy coding\automachron\achron.exe /s
Config & Exit the Automachron

3. Put instrsrv.exe & srvany.exe files in a directory c:\reskit, open command prompt:
c:\reskit\instrsrv.exe Automachron c:\reskit\srvany.exe


4. Configure the following registry entries:
HKEY_LOCAL_MACHINE\SYSTEM\CurrentControlSet\Services\Automachron
From the Edit menu, click Add Key and name it Parameters.
Next from the Edit menu, click Add Value and type this information.
Value Name: Application
Data Type: REG_SZ
String: C:\Program Files\One Guy Coding\Automachron\achron.exe /s

5. Check Automachron’s LOG to ensure achron.exe run as a service successfully.

Tuesday, December 12, 2006

Solaris "root password" Recovery

今天從 http://solaris.tophk.net/forum/viewtopic.php?t=117 & http://wiki.gceclub.sun.com.cn/index.php/Opensolaris_chinese_faq 看到的 =)

較近的 solaris 10u1 & 11 (是用 grub 開機的):

1. start from "fail safe" mode
2. 系统會問你是否 mount "/" 分區到 /a 上,選 yes
3. 编辑 "/a/etc/shadow",delete "root" 的passwords,save & reboot

Solaris 9 & 10  (不是用 grub 開機的):

1. 用 disk 1 boot 機
    [X86]: BIOS set cdrom boot 機
    [Sparc]:press "Stop+a" (SUN keyboard) or "ctrl+break" (PC keyboard) 進入到OBP & enter:
                   ok boot cdrom -s

2. 然后,mount "/" 分區,edit "shadow":
    mount /dev/dsk/c0t0d0s0 /mnt (assume 你 harddisk 上的 "/" 區是 "/dev/dsk/c0t0d0s0"
    vi /mnt/etc/shadow

另一方法

1.將安裝Solaris 10光碟片第一片放進來,並開機
2.選擇安裝方式,直接按【Enter】繼續
3.會開始拷貝系統安裝所需要的資料,大約等了5分鐘,會進入選擇語言畫面
4.利用滑鼠按下右鍵,選擇【Windows\New】,會出現一個新的視窗
5.輸入 mount /dev/dsk/c0d0s0 /mnt指令,會將根目錄Mount在mnt目錄下
6.輸入chmod 600 /mnt/etc/shadow
7.編輯/mnt/etc/shadow檔案,將root這一行的第二個密碼欄位Del掉,使其 保留空白
8.儲存結束,並重新開機,記得光碟片要拿起來,就不用輸入密碼,可以直接 登入

Monday, December 11, 2006

wireless network diagram 記錄

一個 wireless 的 network diagram
只是作為日後參考,所以一些 confidential 的 data 己給我刪除了 XD (係咪好似有d黑點呢???)

Tuesday, December 05, 2006

越過 ISA & Websense 的msn blocking

很多人都有用過 web 版的 msn 吧! 但 websense 是可以把它輕易的 block 掉。但 www.e-messenger.net 就會可以成功連線 msn,因為它應該是用回 80 port 出街的。
Friday, November 17, 2006

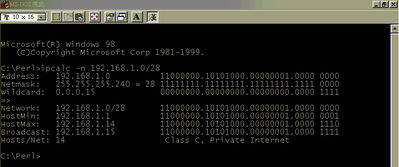
ipcalc on windows

linux 有個好好用的計 ip 工具 -- ipcalc
想在 windows 用都可以的, here is:

1. download ipcalc.pl from http://jodies.de/ipcalc
2. download activeperl from http://www.activeperl.com
3. install activeperl just click "Next" and "Finish" XD
4. move the ipcalc.pl file to c:\perl
5. open the command prompt
6. cd c:\perl
7. pl2bat ipcalc.pl
8. thats it!

Wednesday, October 18, 2006

好用的network monitor tool

偉大的祖國真係有好多不太出名, 但非常強勁的軟件同人材 XD

Colasoft Capsa 6.2 一隻比 ethereal 介面更美觀和易用的網絡監察工具, 為一可惜是只有簡體版 (在XP用是沒問題的, 只要你識睇簡體)

個人免費試用下載 http://www.colasoft.com.cn/download/capsatech.exe

它有好多圖像化顯示, 可以好清晰咁了解到實時的網絡traffic =) 覺得好用就買商業版吧

p.s. 有點像賣廣告 anyway 請支持 "made in china"

Wednesday, October 11, 2006

Windows XP auto-reboot problem

試過好多次遇到 Windows XP 不停 reboot 的問題, 無論正常或 safe mode 都一樣! 一向的解決方法都是 re-install (不影响 data) Window 和 所有的 program, 實在浪費時間...
 
今日無意中在網上發現到一個類似的 case 和解決方法 =) 有機會就 check 下 work 唔 work???
 
方法大槪是要令到一個叫 "cnsminkp.sys" 的 file 不會在開機時就 run, 咁就 ok 了 =)
 
solutions:
1. find and delete cnsminkp.sys (default path 是 C:\Windows\System32\cnsminkp.sys)
     如果有裝2個以上的 OS, 就好簡單啦 (當然要 read 到 WinXP 的安裝目錄);
     如果得一個 OS 咁就入去 "恢復控制台" 啦
 
2. Disable CnsMin
    同樣可以入去 "恢復控制台", 輸入 " Disable CnsMin" 的 command

Sunday, September 03, 2006

Saturday, July 15, 2006

BIOS有密碼點算???

當你整機時發現個 BIOS 有 set 到密碼,你是否又諗住拆機 clear CMOS 呢???

GREAT NEWS! 這個網頁提供了一些 BIOS 制造商的 BLACKDOOR 密碼 How to Bypass BIOS Passwords
e.g.
Award BIOS backdoor passwords:
ALFAROME   BIOSTAR   KDD   ZAAADA
ALLy   CONCAT   Lkwpeter   ZBAAACA
aLLy   CONDO   LKWPETER   ZJAAADC
aLLY   Condo   PINT   01322222
ALLY   d8on   pint   589589
aPAf   djonet   SER   589721
_award   HLT   SKY_FOX   595595
AWARD_SW   J64   SYXZ   598598
AWARD?SW   J256   syxz    
AWARD SW   J262   shift + syxz    
AWARD PW   j332   TTPTHA    
AWKWARD   j322        
awkward            
 
AMI BIOS Backdoor Passwords:
AMI   BIOS   PASSWORD   HEWITT RAND
AMI?SW   AMI_SW   LKWPETER   CONDO

Wednesday, June 28, 2006

免費下載多種 language 的 ebook

網主收集了多種 programming language 的 ebook 供各位下載 =) good

http://www.computer-books.us/

Thursday, June 22, 2006

FreeBSD r6.1 安裝 notes (1)

因我用 winxp boot 機,所以先把 freebsd cd1 中的 boot/boot1 copy 到 C:\fbsdboot\boot1
修改 boot.ini︰加入 C:\fbsdboot\boot1="freebsd 6.1"
(p.s. 跟著這裏教的 =D)

用 disk genius 清空一個 10G partition,把 freebsd 安裝下去!直接用 auto 分了區 (比較 lazy 嘛,加上我肯定 freebsd 的 FDisk 比 RH Linux 的差 XD), 再 set 好一堆必要的東東....
因我只有 cd1,所以連 cvsup 都要上 ftp 取來裝。終於都安裝完 freebsd.....一個超簡陋的 x-windows 模式。

真正的 post-install 才開始 (救命!)︰
# cp /usr/share/examples/cvsup/ports-supfile /usr/local/etc (有點多餘的 =P)
# cvsup -h cvsup2.freebsd.org /usr/local/etc/ports-supfile.....超耐 =(

安裝 icewm (windows manager)、firefox、openoffice、icewmcp等....又花去了一段時間設定

總算有個似像的 OS (一點 server 功能都沒有 XD)

Sunday, June 11, 2006

無用的 Partition Magic & 有用的 Disk Genius

今天本來一嘗 install FreeBSD 的滋味,但竟然浪費了很多時間的在 Harddisk 的分割上....唉!

我的電腦本來已經有一個 winxp 和一個 win2003 =D 但只有一個 primary , so 我要 create 多一個 primary。奇怪的事開始發生了....一心想用win2003 的 disk manager,boot 唔到入 win2003 ??? 算 X D ! 我發現原來 winxp 都有 disk manager,但原來係癈的......

好就用 partition magic 吧,點知它竟然認不出我一些 partition ,只認到一塊 winxp 的 fat32 (primary)、一塊未format的(留給 FreeBSD 用)、一塊吉的 ntfs和其它一大塊在extend 中的 unallocated 的空間。其實在一大塊中還有幾個 fat32 和 我的 win2003....迷???

我就沒理會那個「迷」,直接把那塊未 format 的空間轉為第二個 primary。當我按下 apply 後,麻煩就開始了.....我在 winxp 中見不到所有其它存於 extend 中的 drive, 包括我的 win2003。

我在 winxp 中只看見一個 c:\、一個留給 FreeBSD 用的 drive 和 那個吉的 ntfs。bullshit 我實在太相信 partition magic,我以為它只會做我叫它做的事 (把其中一塊 extent partition 轉為 primary ),竟然還把一大塊它認不到的 extent partition 消失掉。我所有的其它 data 都無了嗎??? 不會吧......

又要靠 google 了,好彩偉大的祖國人民發明了一個 program ==> Disk Genius。可以簡單地 (其實是自動地 =D)重新 setup 好 partition table。你只需要一張 dos 的 boot 機碟 (我都花了一點時間,才找到一張 N 年前的 win95 bootdisk =P),因為 disk genius 只會在純 dos 的還境下工作。

運行 disk genius 後,它有一個重新設置 partition table 的功能可以自動搜尋 harddisk 中存在的各種不同格式的 partition 然後重新寫入 partition table 中。GOOD~~太偉大啦.......

ps. disk genius is free...and it also includes many functions for disk management =D

Friday, June 09, 2006

好用的 rss reader

用 RSS 去睇 BLOG 真係好方便, but 無得留 comments =P

SHARPREADER 一個好簡單易用的 Reader, 不過一樣要裝 M$ 的 .NET Framework (麻煩的 windows >( )
http://www.sharpreader.net/

Wednesday, June 07, 2006

YAHOO Widgets

Widgets 應該是由 Mac 機提出的吧???

anyway 如果你是 windows xp 的用者, 就用 yahoo 的 widgets tool 吧??? 你更加可以自己開發及將它分享出來啊! =D

http://tw.widget.yahoo.com/

Sunday, May 21, 2006

Lotus Notes 6

之前從未試過在家中的電腦安裝 Lotus Notes,一向都覺得 Outlook Express 都已經很夠用了 =D印象中 Notes 應該和 M$ 記的 OUTOOK 差不多吧??? 不過既然從未深入接觸過......(強烈好奇心下)一於裝裝它吧=D

一開始就出事了 - how/where to get it ??? 我記得 notes 是 free 的,domino server 就要錢買 (應該無記錯吧???) ...好自然地 google 一下吧! oh my god! IBM 買起了 LOTUS 吧??? 唉.....我完全不知道 =( 以為好容易就 download 到 notes 7,but 又要 register (最討厭的 step),最後重要不能成功 reg 到 有無搞錯 =[] $%#!@!#@

再 google x 1 x 2 x 3 x 4.......GREAT 終於比我找到了 (原來一點不易??? 奇怪...不是 free 的嗎)雖然只是 R6 但都不錯,加上我本身只是想裝 notes 5 (因曾經接觸過 =D)
安裝過程一如所料般 easy,不消幾分鐘便搞掂了 yeah! notes 6 的介面比 notes 5 漂亮很多,不過我並不喜歡因為華麗的介面而要消耗 resource 的 software,好彩 notes 6 都不算太慢 (當然 R5 會更快)

我沒有 domino server,所以只好用來做 pop/smtp 等 internet services .....當所有 setting 都無難度地完成後,打開 inbox 之際.... 空白一片,OE 中的 SEND & RECEIVE 同 NETSCAPE 中的 GET MESSAGE 在 NOTES 中是叫什麽的呢??? 我發現自己真的是退步了很多,一個咁簡單的 software 都要 google 幫手...唉! 原來 notes 中是有一個叫 REPLICATION 的功能的 =P。
一於用 NOTES 取代我的 PALM DESKTOP 吧 =D

Saturday, May 06, 2006

復原 MySQL root 密碼

忘記了 MySQL 的 root 密碼,可以用以下方法重新設定:

1. 關閉 MySQL 伺服器。

2. 用以下指令啟動 MySQL,以跳過檢查權限的資料表
mysqld_safe –skip-grant-tables &<

3. 現在己經可以用空密碼進入 MySQL
mysql -u root

4. 進入 MySQL 後執行以下指令更改 mysql root 密碼:
mysql> update mysql.user set password=PASSWORD(”new_password”) where User=’root’;
mysql> flush privileges;
mysql> quit

5. 最後只需重新啟動 MySQL,便可以用新設定的密碼進入了。